

|
|
|
| When I first decided I'd like some backup power for lights,
TV, and a fan, I bought a marine 12V battery (group 27), hooked it up to an
automotive charger set in the deep cycle mode, wired up an inverter, and let
it set for months. It was a smart charger, or so I was led to believe.
Multi-stage charging, what's that? The rare times I check my
automotive batteries, they rarely need water. They get
charged/discharged daily. So a battery sitting on a charger should
need even less maintenance - wrong! A year after buying the battery, I came home from work, opened the garage door, and was greeted with a horrible rotten egg smell. The charger at some point came off trickle mode, and charged the battery hard enough to lower the water level. Dead battery, garage full of fumes. Not good. Unlike a car that's probably only run for an hour a day, this battery was on charge 24/7. The next revision replaced the single marine battery with two golf cart batteries. I couldn't find Trojan T-105 batteries locally for a reasonable price, so I purchased Exide GC-135 batteries. These are also golf cart batteries, rated at 6V each, 226 AH. These weigh about 70 lbs each. These type of batteries have thick plates, intended for abuse, and deep discharges. They are very popular with the RV crowd as well as the smaller off-the-grid setups. The battery charger was also replaced with a Xantrex 10-TB. This is a multi-stage charger, smart enough to properly charge and maintain batteries. This was used while my solar array was growing. I now have enough panels that the grid powered Xantrex charger is only needed if it's raining heavily for a couple of days. |
 My original setup. A Sears automatic charger, a marine battery, and a 1500 Watt inverter. Worked fine until I cooked the battery. |
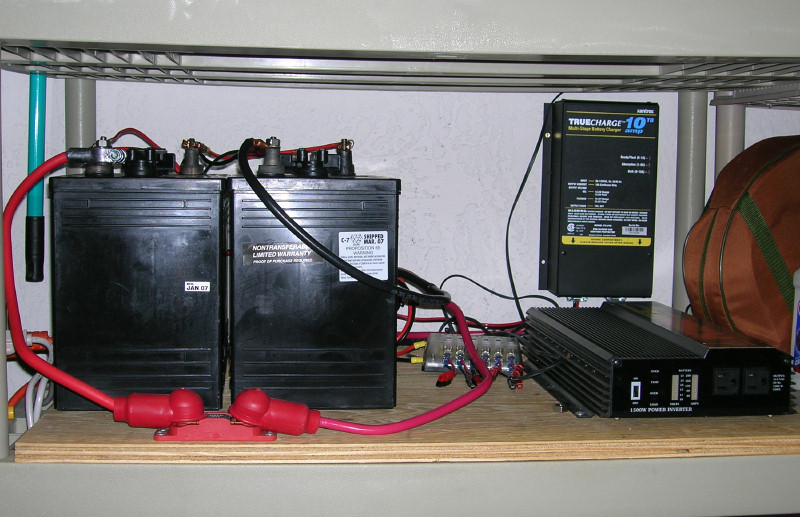 Next step. Upgraded the marine battery to two golf cart batteries wired in series. Each battery is 6V at 226 Ah. Combined, they provide 12V at 226 Ah. Note the small Xantrex charger mounted to the wall. No worry of overcharging batteries anymore. |
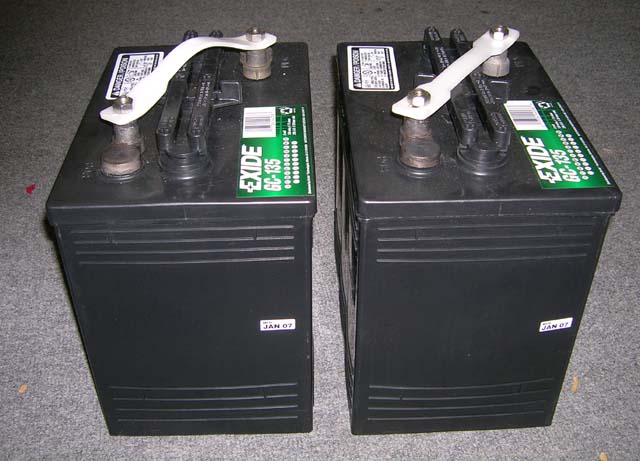 The golf cart batteries weigh about 70 lbs each, about as heavy as I'd ever want to lift manually. These were $79 each at BJ's Wholesale Club in 2007. Last year the price jumped to $99, but now back down to $89 each. |
 Specs on the battery. |
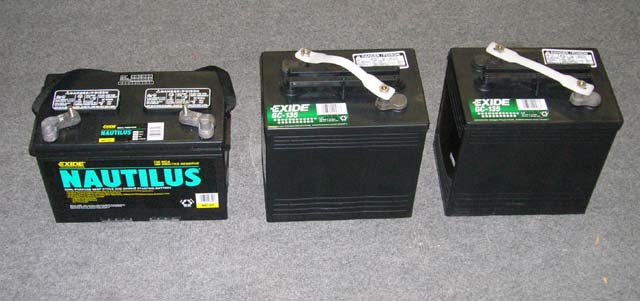 The golf cart batteries have a slightly smaller footprint, but are taller/heavier than the group 27 marine battery. Consider how much more lead it takes to make 12V with golf cart batteries. Thicker plates take more abuse. |
 I bought a hydrometer at Ace Hardware ($5). It's the most accurate way to determine a battery's state of charge. Also can verify all cells have the same reading. |
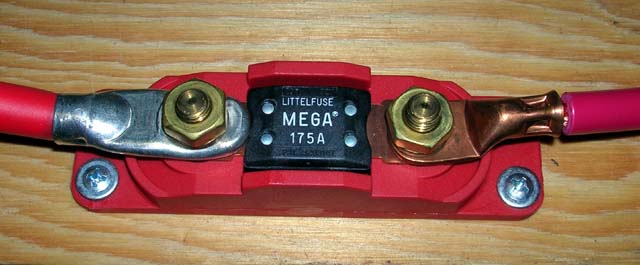 Make sure you put a fuse in your system. A battery bank can produce a massive spark/explosion! |
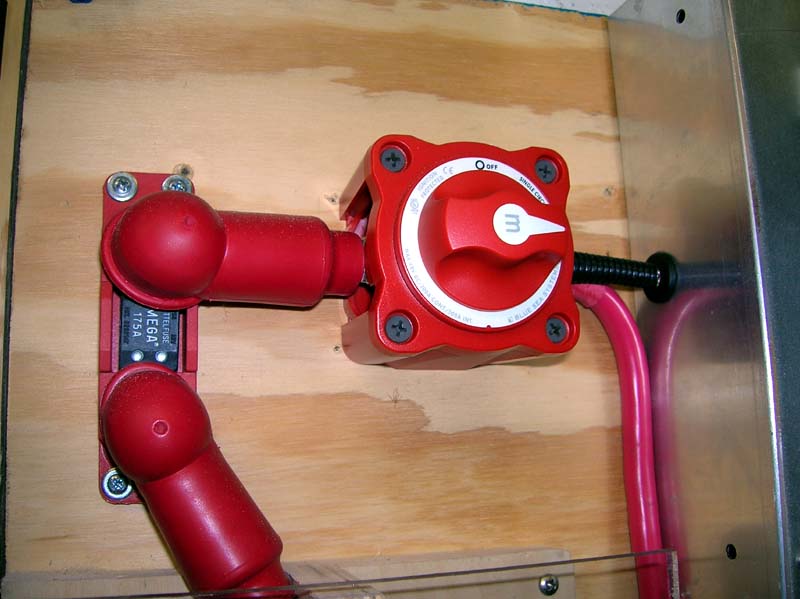 Along with the fuse on the left side of this picture is a power switch, which will disconnect all loads from the buss bars when working on the system. |
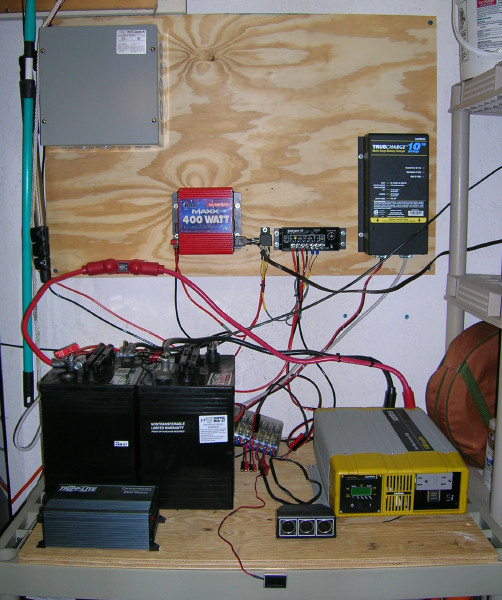 Excuse the wiring mess, but this next revision upgraded the inverter to a Prosine 1800 Watt model. I was still trying to figure out what to place where. |
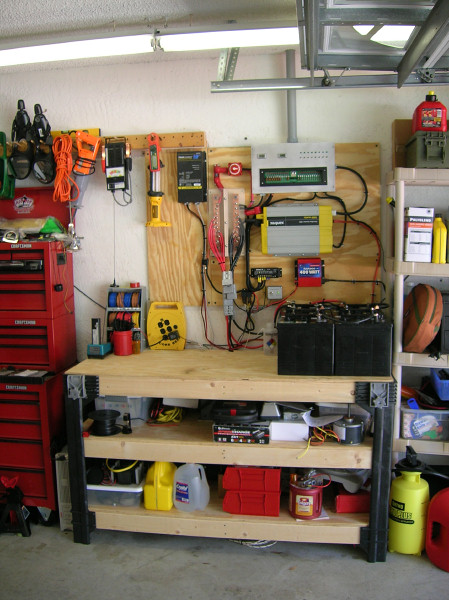 I built my own workbench from a kit purchased at the Amazon website. Each shelf is rated for 1000 lbs. At this point, the system has a total of 6 batteries. 12V @ 678 AH. My goal is to add two more batteries, for a total of 904 AH. |
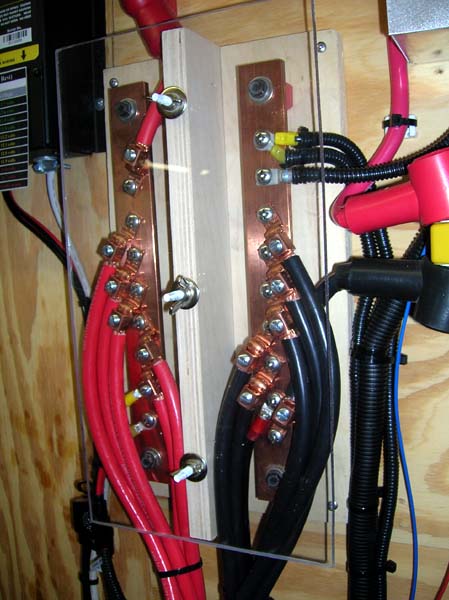
 A little closer view of the battery bank. I used 2 gauge wire exclusively. Each pair of batteries are tied in series to make 12V, then connected to the copper buss bars via a 175 Amp rated Anderson quick disconnect. Each successive pair are paralleled once connected to the buss bars. If a battery develops an issue, the connector can simply be pulled to remove that pair from the circuit. |
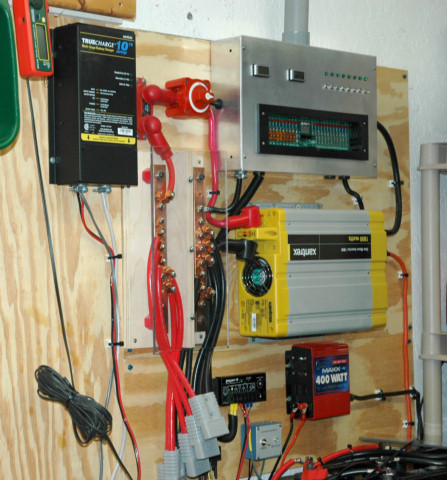 A closer view of the custom built buss bars, the fuse above, and the switch beside it. The silver box at the top is a DC distribution panel I built. The 24 position fuse holder is actually an RV fuse panel made by Iota. When a fuse blows, an LED illuminates, making troubleshooting very quick. Paid about $20 for it on Ebay. |
 One of the issues than can occur by simply daisy chaining batteries in parallel is the ones closest to the load do most of the work. By putting all the batteries on a common buss, they charge/discharge more evenly. This same method is used by phone companies that have massive backup battery banks. |
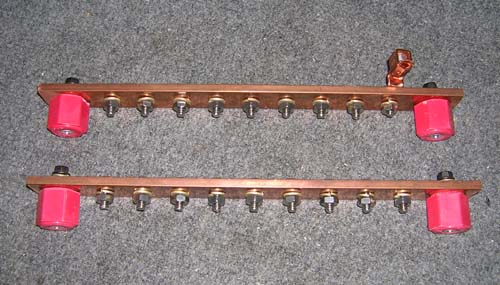 Rather than tap the copper, I drilled holes completely through the copper, and used 1/4-20 stainless hardware. The insulators were purchased online from Storm Copper. P/N 1100-A1, $1.05 each. The copper buss bars were purchased from Online Metals. 2 pieces @
$15.88/piece |
 The wire clamps were purchased from Home Depot. Made by Thomas & Betts, P/N BTC0208. They are also available here if your local HD doesn't have them in stock: Link. This model will hold up to 2 ga wire. Easy to use. Trim the insulation, loosen the set screw, slide in the conductor, tighten the set screw. |
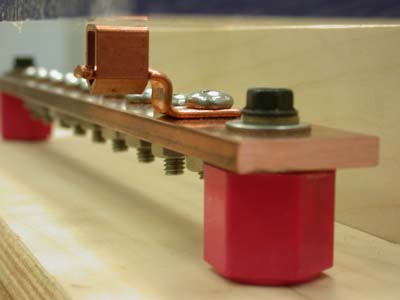 I got lucky here. I had enough clearance between the cable clamp (s), and the Lexan cover I added. The fix would have been to make a taller divider. |
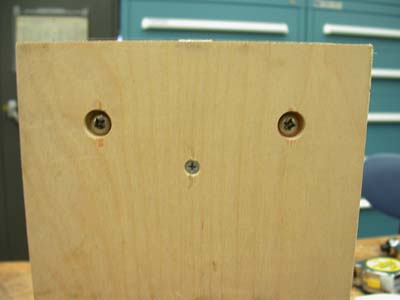 The underside of the buss bar board. You can see the recessed screws at the top holding the insulators to the board. The smaller screw in the center holds the wooden divider in place. |
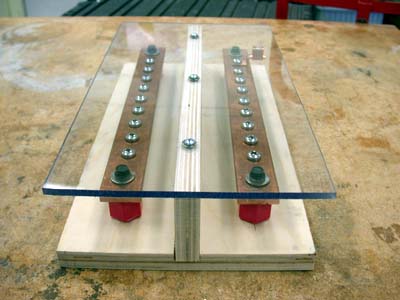 Here's the assembled buss bar. The divider prevents any conductor from bridging the copper bars. The Lexan cover adds another level of protection, while still having the connections viewable. |
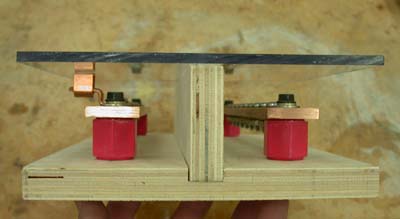 A view from the end. Now you can clearly see how close the cable clamp came to the Lexan cover. |
 Here it is installed. The only modification I made was to replace the screws holding the Lexan cover in place with hanger bolts. No fumbling with screws. Remove the three wing nuts, and the studs hold the cover in place until I lift it off. |
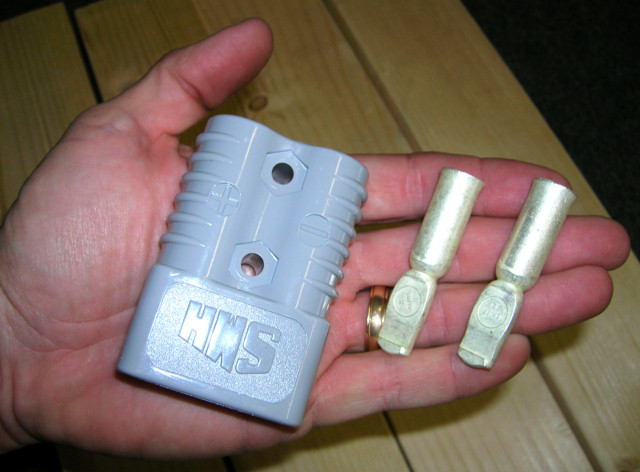 These connectors are huge. Rated at 175 Amps, made by Anderson. These are overkill for my setup. If I max out my my inverter, it'll pull about 200 Amps. With 4 pairs of batteries sharing the load, that's about 50 Amps per pair of batteries. So each connector would see a maximum of 50 Amps, well below the rating. But if I have a battery failure, pulling a connector won't overload the rest of the connectors. |
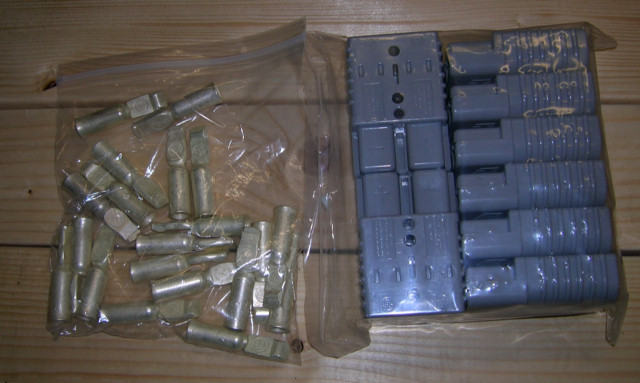 I bought a pack of these. You'll need two connectors per connection. These can be purchased for various sized wire, and different color connectors. IIRC, I bought these at Arizona Wind & Sun. About $12 each. Available here: Link. |
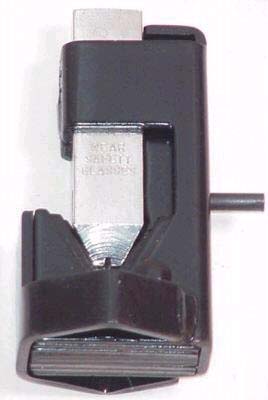 I bought a Lenco anvil style cable crimper from Ebay ($14.50). Simple to use and effective. |
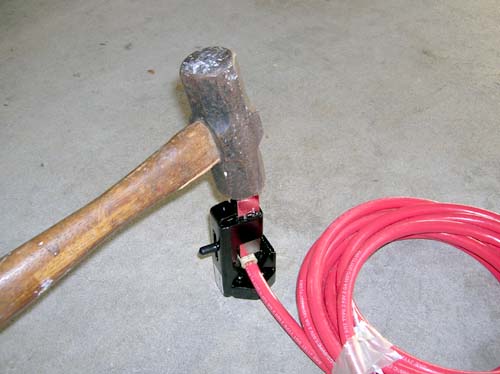 Trim the insulation on the cable, slip on the connector pin, slip it into the anvil, and smack it with a hammer. A depth gauge on the anvil assures than it has compressed the connector properly. It also has a 'ring' sound when this point has been reached. |
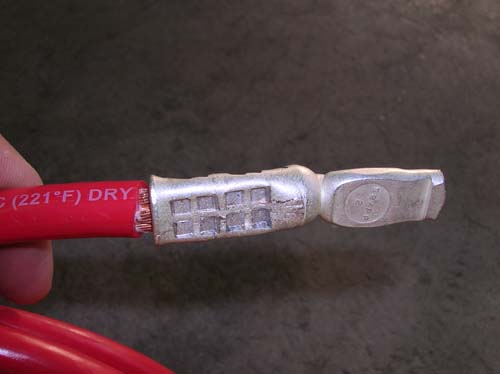 This large pin requires crimping in two spots. |
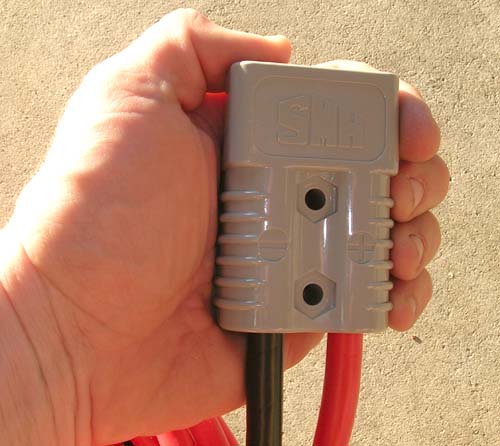 The pins slide into the plastic housing, and snap into place. The cables from the buss bars to the connectors, and the cables from the batteries to the connectors, were of all equal lengths. Trying to ensure each battery pair is working equally. |
My favorite search engine!
|
|
Last updated 07/18/22 All rights reserved. |
